Have you ever experienced the frustration of seeing your vehicle’s headlights fog up due to condensation? Not only does this fogging diminish the light your headlights provide, but it can also corrode your headlight components over time. So why do your headlights fog up and how to deal with it?
What Causes Moisture in Headlights?
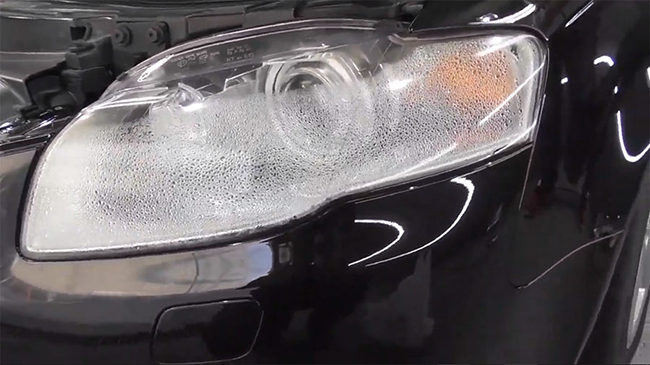
Most headlight housings have vents at the bottom and top that play an important role in pressure control. Air flows in and out of headlights through these vents to equalize pressure on the outside and inside. You may notice that your headlights heat up through normal operation. If the outer lens cools down faster than the air inside the headlight unit, moisture in the air and plastic components collects on the inside of the outer lens. This is a natural process. Condensation typically disappears within 30-60 minutes and does not adversely affect the functionality of the headlight.
However, if the moisture accumulates and forms something like a pool, then there is an issue. That's not condensation as mentioned above. In most cases, this may be a sign of water ingress that can cause damage to headlights and affect your visibility while driving. Water ingress usually indicates that there may be cracks or fissures in the headlight assembly. In addition to cracks, the issue may also be caused by faulty connections. In this situation, the culprit could be worn-out vent caps, which will allow both water and air to get into the headlight housing. Also, if the bulb's O-ring is worn, water will enter and may be difficult to get out.
How to Get Moisture Out of Headlights?
The easiest way you can take is to wait for the moisture to dry naturally. Usually, when you turn on the headlights, the heat causes the moisture to evaporate. It can also evaporate on its own throughout the day, as the sun warms things up enough to do the same job. Driving your car also helps because it allows air to pass through the vents in the light housing and remove the moisture, much like running the defroster in your car's cabin to clear the windshield.
To get the moisture out of your headlights, check your headlight housing vents first. The exact location of the vent will depend on the make and model of your car, but most headlight units have a vent to help prevent condensation buildup. A common cause of condensation is a blocked vent that might be caused by debris, spider webs, or dust. You can carefully wipe the vent or blow it out with compressed air. Try not to blow or push any debris into the headlight housing, or you will have to break the seal to remove it.
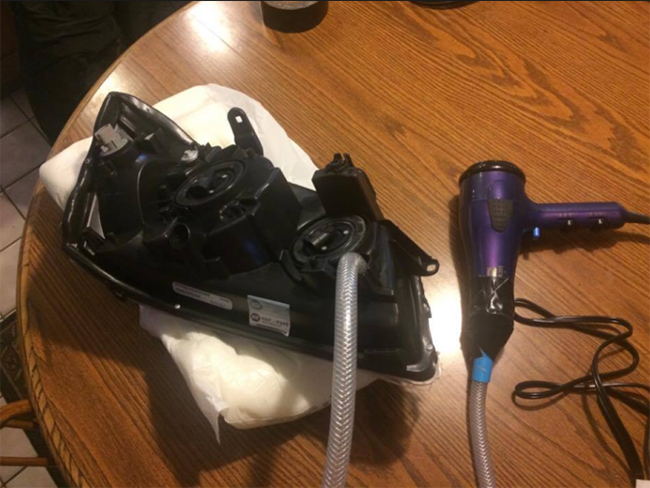
Depending on the level of the condensation, there are several ways to clear it out. If the condensation is minor, you can use a bit of compressed air or a couple of desiccant packets to get rid of any moisture in the housing. If there is a significant amount of condensation, you will need to take the headlight unit apart and remove the bulbs, plugs, electronics, and vents from it. Do not try to break the seal between the lens and the housing, as resealing everything can be particularly complicated and time-consuming. Then you can use a hairdryer to blow dry, hot air into the vent or on the outside of the headlight unit. As it heats up, the condensation should disappear. Wait until your headlight unit has cooled to see if this strategy works.
To completely get water out of your headlight, you will need to remove the seal. Wipe off the existing moisture with a clean and dry cloth. In this way, you can remove most of the moisture, but it isn’t a perfect solution. It is recommended to use silica gel packs that have been proven to soak up the remaining moisture effectively. Please make sure these silica gel packs aren’t blocking the light or being exposed to the bulbs. Don't forget to check again to see if there is any existing moisture or debris in your headlight assembly. Finally, reseal your assembly carefully. This is the most important step because improper reinstallation usually allows more moisture to enter your headlights.
Can I Drill a Ventilation Hole in Headlights to Get Rid of Moisture?
No, this may only make the problem worse. The flow of air through the enclosure would be compromised and there would also be a much greater risk of dirt getting into the headlights. The dirt won't go away on its own. However, there are some headlights that are not exactly well designed, and some are installed with less than optimum ventilation. To improve the exchange of air, some manufacturers have issued instructions on how to install additional tubes or make changes to the ventilation holes. You'd better ask your official dealer for details.
How to Seal Headlights from Moisture?
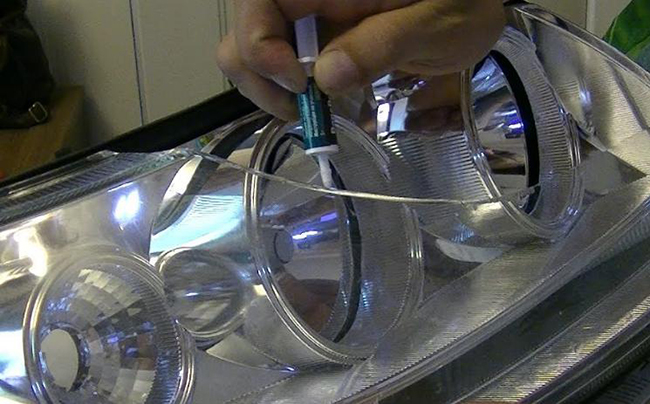
The key to preventing further moisture in your headlights is to create a strong seal. First of all, you need to examine the headlight assembly for any cracks, leaks, or holes. With an idea of where the damage is, you can choose the proper headlight sealant to do the task. You can choose a silicon-based or vinyl-based sealant as they are both heat and water-resistant. Most are also durable and can offer a permanent seal on the affected area. Just put some generous amount of the sealant on the damaged region and spread it evenly. You can use plastic like a credit card to spread the sealing material, especially those that you should not touch with your bare hands directly. Most sealants have a curing time of up to 24 hours, please make sure the seal is firm before assembling the headlight back to your car.
You also need to do a complete inspection of the rubber seals on the headlight unit, such as the sealing electronics, bulb cover or O-ring, vents, as well as sealant between the lens and housing. Try to identify where water might enter or where air might not be able to escape. These components typically have a rubber build, and if the rubber wears out, you need to get a replacement. As for the O-ring, you can replace the entire bulb or apply some dielectric grease on the surface to enhance its grip. It is important to inspect the seal between the lens and the housing carefully for any damage or debris. If necessary, you can run a bead of silicone sealant around the factory seal area to ensure no moisture can enter the headlight assembly, or replace the seal if your housing uses a replaceable one.
It’s time to reinstall your headlight after you’ve carefully inspected and sealed it. Check that you have the correct angle and make sure that all brackets and electrical connectors are firmly in place. Test out your headlight to see whether it’s working properly and shining brightly. You need to routinely inspect your headlight for any signs that it may not have sealed properly. If your headlight is severely damaged or still collects moisture, it may be time to replace a pair of brand-new headlight assemblies.
Need to clean your headlights at home? Check here:
How to Clean Headlights at Home


